Contents
Manufacturing Insight: Cnc Machine M Code G Code

Mastering CNC Programming Fundamentals for Precision Manufacturing
At Honyo Prototype, our expertise in CNC machining centers on the seamless integration of G code and M code programming to deliver uncompromising precision and efficiency. G codes govern geometric movements—defining tool paths, coordinates, and interpolation—while M codes manage critical machine functions such as spindle activation, coolant flow, and tool changes. This foundational knowledge ensures every component we produce adheres to stringent tolerances and complex design specifications, eliminating errors that stem from misaligned programming logic or suboptimal machine control.
Our engineering team leverages decades of hands-on experience to optimize these codes for multi-axis milling, turning, and mill-turn operations, transforming CAD/CAM outputs into flawless physical parts. Unlike generic service providers, we prioritize code validation through rigorous simulation and iterative testing, reducing cycle times by up to 25% while maintaining micron-level accuracy. This technical rigor directly translates to faster time-to-market and minimized material waste for your prototyping and low-volume production needs.
Partner with Honyo to convert intricate designs into high-integrity components, supported by transparent engineering collaboration from quote to delivery. Begin the process instantly: access our Online Instant Quote platform for real-time pricing and lead time estimates, engineered to reflect the precise programming and machining complexities your project demands.
Technical Capabilities

CNC Machine Technical Specifications: M-Codes, G-Codes, and Capabilities for 3/4/5-Axis Milling, Turning, and Tight Tolerance Applications
The following table outlines the technical specifications and operational capabilities of CNC machines used in precision manufacturing environments, with a focus on multi-axis milling, turning, tight tolerance requirements, and compatibility with common engineering materials such as Aluminum, Steel, ABS, and Nylon.
| Parameter | Specification Details |
|---|---|
| Machine Types Supported | 3-Axis, 4-Axis, and 5-Axis CNC Milling Centers; CNC Turning Centers (Swiss and Standard) |
| Control System Compatibility | Fanuc, Siemens Sinumerik, Heidenhain, Mitsubishi M700/V700, Haas, and LinuxCNC |
| G-Code Standards | ISO 6983 (EIA 310) compliant; supports modal and non-modal G-codes for motion control, coordinate system selection, tool compensation, and canned cycles |
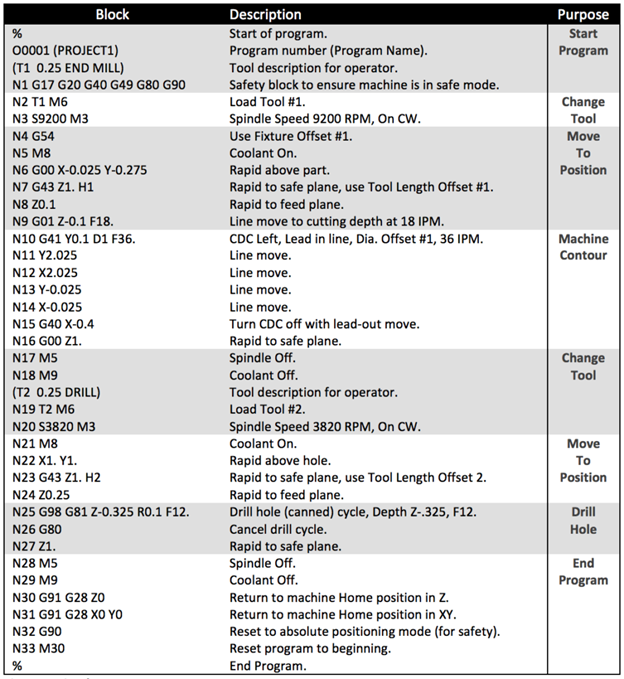
| Common G-Codes | G00 (Rapid Traverse), G01 (Linear Interpolation), G02/G03 (Circular Interpolation), G17/G18/G19 (Plane Selection), G20/G21 (Inch/mm), G40/G41/G42 (Cutter Radius Compensation), G54-G59 (Work Coordinate Systems), G81-G89 (Drilling Cycles), G90/G91 (Absolute/Incremental), G94/G95 (Feed per Minute/Revolution) |
| M-Codes Functions | M00 (Program Stop), M01 (Optional Stop), M03/M04 (Spindle On CW/CCW), M05 (Spindle Stop), M06 (Tool Change), M08 (Coolant On), M09 (Coolant Off), M30 (Program End and Rewind), M98/M99 (Subprogram Call/Return) |
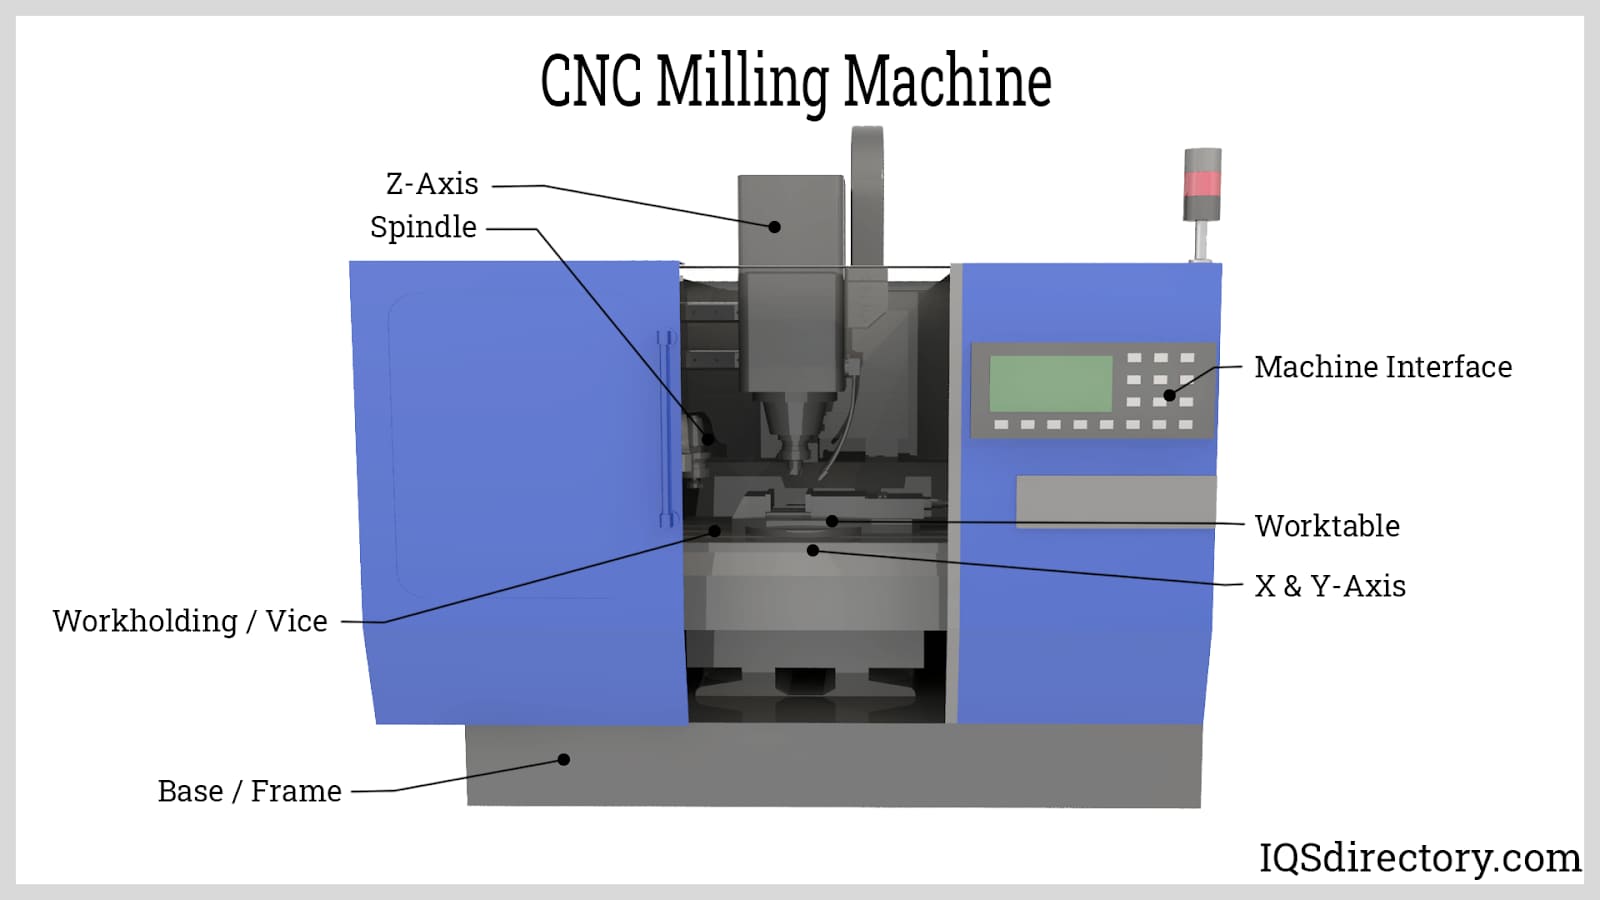
| Axis Configuration | 3-Axis: X, Y, Z linear axes; 4-Axis: X, Y, Z, + A (rotary about X); 5-Axis: X, Y, Z, A, B (or C) enabling full tool orientation and complex geometry machining |
| Positioning Accuracy | ±0.005 mm (0.0002″) for standard machines; ±0.001 mm (0.00004″) achievable on high-precision CNC platforms |
| Repeatability | ±0.002 mm (0.00008″) typical; up to ±0.001 mm (0.00004″) on calibrated machines |
| Tight Tolerance Capability | Capable of holding tolerances down to ±0.0125 mm (±0.0005″) consistently; with process control and metrology, tolerances of ±0.005 mm (±0.0002″) are achievable |
| Spindle Speed Range | Milling: Up to 24,000 RPM (high-speed spindles available); Turning: Up to 6,000 RPM (varies with chuck size and material) |
| Tool Changer Type | Automatic Tool Changer (ATC) with 12–60 tool capacity; HSK, CAT, or BT tooling interfaces |
| Materials Processed | Aluminum (6061, 7075), Steel (1018, 4140, Stainless 303/316), Plastics (ABS, Nylon 6, Nylon 6/6, Delrin) |
| Material-Specific Notes | Aluminum: High feed rates, low cutting forces, coolant recommended; Steel: Lower speeds, rigid setup, carbide tooling; ABS: Low melting point, sharp tools, reduced heat; Nylon: Clamping care due to creep, controlled feeds/speeds |
| Coolant Systems | Through-spindle coolant (optional), flood coolant, mist coolant; air blast for non-metallic materials |
| Work Envelope (Typical) | 3-Axis Milling: 800 x 500 x 400 mm; 5-Axis: 600 x 400 x 300 mm; Turning: Max diameter 300 mm, length 500 mm |
| Surface Finish Capability | Ra 0.8 µm (32 µin) standard; down to Ra 0.2 µm (8 µin) with fine finishing passes and polishing toolpaths |
| Programming Interface | CAD/CAM integration (SolidWorks, Fusion 360, Mastercam, Siemens NX); conversational programming supported on some controls |
| Probing Systems | On-machine touch probes for tool setting, workpiece alignment, in-process inspection, and automated setup |
| Thermal Compensation | Active spindle and structural thermal compensation on high-end models to maintain dimensional stability |
This specification set reflects configurations typical of modern CNC machining centers used in prototype and low-volume production environments at Honyo Prototype, where precision, material versatility, and multi-axis capability are critical.
From CAD to Part: The Process

Honyo Prototype’s CNC machining workflow integrates M-code and G-code generation as a critical internal technical step within the Design for Manufacturability (DFM) phase, not as a standalone client-facing stage. Our process ensures precision, efficiency, and manufacturability from initial upload to final delivery. Below is the accurate sequence with technical clarification on M/G-code implementation.
Upload CAD
Clients submit 3D CAD models (STEP, IGES, or native formats like SOLIDWORKS) via our secure portal. Our system validates file integrity and extracts geometric data for the AI-driven quoting engine. No M/G-code exists at this stage; the CAD serves purely as a geometric reference for feasibility assessment.
AI-Powered Quoting
Our proprietary AI analyzes the CAD geometry to auto-generate a preliminary quote within minutes. It assesses factors like part complexity, material requirements, and estimated machine hours. Crucially, this step identifies potential manufacturability flags (e.g., thin walls, tight tolerances) but does not generate machine code. The output is a commercial quote with lead time, not technical programming data.
Engineering-Driven DFM
This is where M-code and G-code are technically created and validated. Honyo’s manufacturing engineers conduct a rigorous DFM review:
CAM Programming: Using Mastercam and Fusion 360, engineers convert the CAD model into toolpaths. G-code (geometric motion commands like G00 rapid move, G01 linear interpolation) defines axis movements, while M-code (miscellaneous functions like M03 spindle start, M06 tool change) controls machine-specific operations.
Post-Processor Application: Custom post-processors translate generic CAM output into machine-specific G/M-code dialects (e.g., Haas vs. DMG Mori syntax).
Simulation & Verification: Code is simulated in software like Vericut to detect collisions, verify toolpath accuracy, and optimize cycle time. Only after 100% virtual validation is the code approved for production.
Key Distinction: M/G-code generation is an internal engineering task within DFM, not a client-visible step. Clients receive a DFM report highlighting manufacturability feedback, not raw code.
Production Execution
Approved G/M-code is loaded onto CNC machines (mills, lathes, multitask systems). Our technicians:
Perform first-article inspection per AS9102 standards
Monitor real-time machining via IoT sensors
Conduct in-process CMM checks for critical features
All machine operations strictly follow the validated G/M-code; no on-floor code edits occur without engineering re-approval.
Delivery & Documentation
Finished parts undergo final QA (including full FAIR documentation) and ship with:
Dimensional inspection reports (CMM data)
Material certifications
Traceable G-code version file (for client archival if requested)
Packaging meeting ITAR/ESD requirements where applicable
M-code vs. G-code in Honyo’s Context
| Code Type | Primary Function | Honyo Implementation Example | Validation Step |
|---|---|---|---|
| G-code | Controls geometric motion (positioning, feeds, interpolation) | G43 H01 (tool length compensation), G54 work offset | Simulated path accuracy check in Vericut |
| M-code | Manages machine auxiliary functions (spindle, coolant, tool changes) | M08 (coolant on), M19 (spindle orientation) | Dry-run test on machine without material |
This integrated approach ensures M/G-code is treated as a controlled engineering output—not an automated byproduct—directly linking CAD intent to physical part fidelity. By embedding code generation within human-led DFM, we eliminate errors common in fully automated quoting systems while maintaining rapid turnaround. Clients receive certified parts with full process transparency, not just a machine file.
Start Your Project
Optimize your CNC machining processes with expert programming in M-code and G-code tailored to your production requirements. At Honyo Prototype, our precision-driven approach ensures seamless machine operation, tight tolerances, and fast turnaround for all your prototyping and low-volume manufacturing needs.
Our state-of-the-art facility in Shenzhen is equipped with advanced CNC machinery operated by skilled technicians who understand the intricacies of G-code and M-code programming for milling, turning, and multi-axis applications.
For technical inquiries or project consultations, contact Susan Leo at [email protected]. Let us support your manufacturing goals with reliable, scalable, and high-precision CNC solutions.
🚀 Rapid Prototyping Estimator
Estimate rough cost index based on volume.