Contents
Manufacturing Insight: Cnc Drawing

Precision CNC Machining: Where Your Engineering Drawings Become Reality
At Honyo Prototype, we recognize that a meticulously defined CNC drawing is the cornerstone of successful precision manufacturing. Our advanced CNC machining services transform complex engineering intent into high-integrity components with unwavering accuracy, adhering strictly to geometric dimensioning and tolerancing (GD&T) standards, surface finish requirements, and material specifications. Leveraging state-of-the-art 3-axis, 4-axis, and 5-axis machining centers alongside stringent in-process inspection protocols, we consistently achieve tolerances down to ±0.0002″ across diverse materials including aerospace alloys, medical-grade stainless steels, and engineering plastics. Every process is governed by our AS9100-certified quality management system, ensuring full traceability and repeatability from prototype to low-volume production.
Our engineering team collaborates directly with your design data to optimize manufacturability, identifying potential pitfalls in tool access, fixturing, or tolerance stack-ups before metal is cut. This proactive approach minimizes costly revisions and accelerates time-to-market for mission-critical applications in aerospace, medical device, and industrial automation sectors. Crucially, Honyo eliminates quoting delays with our Online Instant Quote platform. Simply upload your STEP, IGES, or native CAD file with associated drawing, and receive a detailed, geometry-aware cost and lead time estimate within minutes—enabling faster procurement decisions without compromising technical rigor.
| Key Service Attribute | Honyo Implementation |
|---|---|
| Drawing Compliance | Full adherence to ASME Y14.5, ISO 1101, and client-specific standards |
| Tolerance Capability | ±0.0002″ (5µm) for critical features |
| Material Expertise | Titanium, Inconel, 17-4PH, PEEK, Aluminum 7075-T6, and composites |
| Quality Assurance | CMM, optical comparators, surface roughness testers with full PPAP support |
When your CNC drawing demands uncompromising precision and process transparency, Honyo Prototype delivers engineered solutions grounded in manufacturing excellence—not estimates. Initiate your project with confidence through our validated workflow, starting with an immediate, data-driven quote.
Technical Capabilities

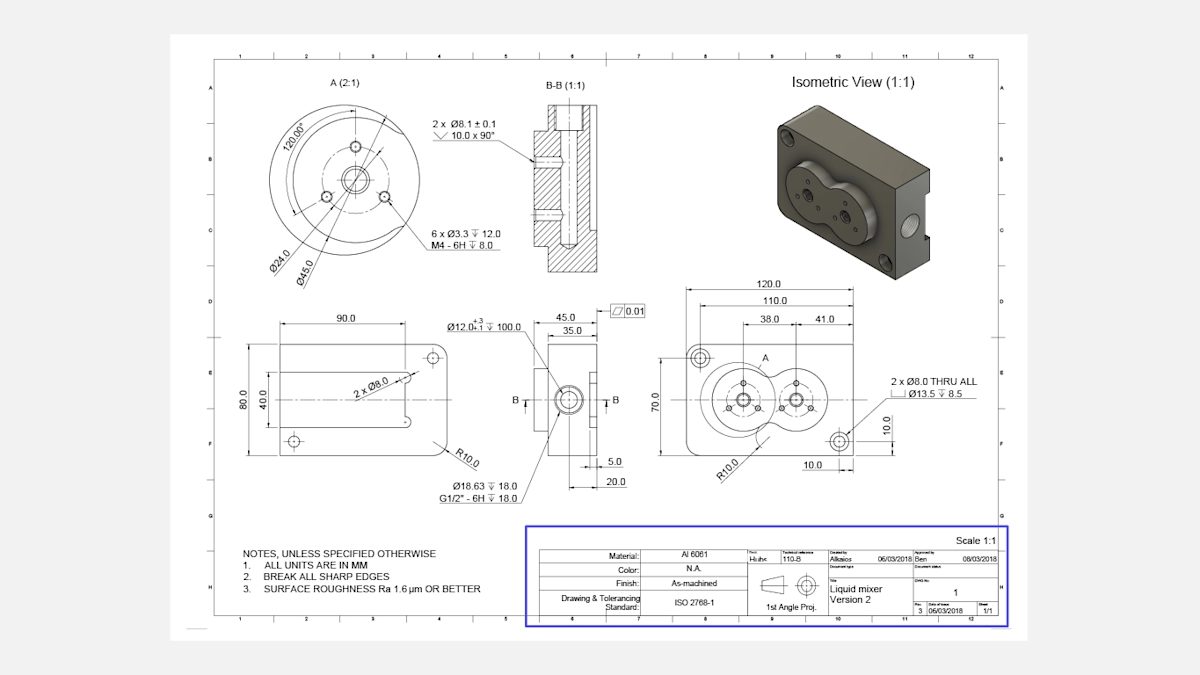
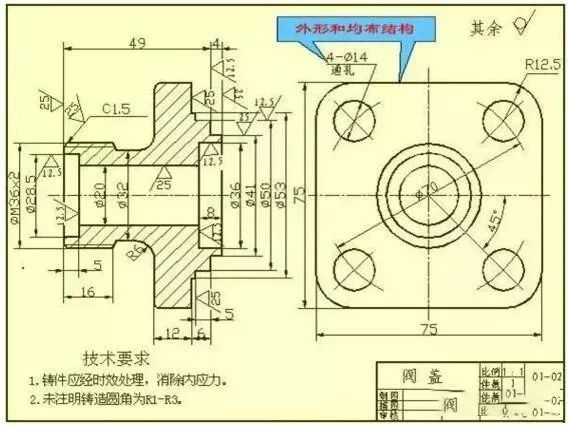
Technical specifications for CNC machining drawings are critical for ensuring precision, repeatability, and compliance with design intent—especially when utilizing 3-axis, 4-axis, and 5-axis milling, as well as turning operations. These drawings define geometric dimensions, tolerances, material specifications, surface finishes, and feature callouts required for manufacturing high-accuracy components.
Below is a detailed specification table covering key aspects related to CNC machining processes, materials, and tight tolerance capabilities.
| Parameter | 3-Axis Milling | 4-Axis Milling | 5-Axis Milling | CNC Turning | Notes |
|---|---|---|---|---|---|
| Typical Positional Accuracy | ±0.005 mm (±0.0002″) | ±0.005 mm (±0.0002″) | ±0.005 mm (±0.0002″) | ±0.005 mm (±0.0002″) | Achievable with calibrated equipment and thermal stability |
| Repeatability | ±0.003 mm (±0.0001″) | ±0.003 mm (±0.0001″) | ±0.003 mm (±0.0001″) | ±0.003 mm (±0.0001″) | Dependent on machine condition and fixturing |
| Standard Tolerance (Machining) | ±0.025 mm (±0.001″) | ±0.025 mm (±0.001″) | ±0.025 mm (±0.001″) | ±0.013 mm (±0.0005″) | Default unless otherwise specified |
| Tight Tolerance Capability | ±0.012 mm (±0.0005″) | ±0.012 mm (±0.0005″) | ±0.005 mm (±0.0002″) | ±0.005 mm (±0.0002″) | Requires process control, metrology, and specialized tooling |
| Surface Finish (Typical) | 3.2 μm (125 μin) | 3.2 μm (125 μin) | 1.6–3.2 μm (64–125 μin) | 1.6 μm (63 μin) | Can achieve 0.8 μm (32 μin) with finishing passes |
| Max Work Envelope (Typical) | 1000 x 600 x 500 mm | 800 x 600 x 500 mm (with rotary) | 600 x 600 x 500 mm (full 5-axis) | Diameter: 500 mm, Length: 1000 mm | Varies by machine; custom setups available |
| Common Materials | Aluminum (6061, 7075), Steel (1018, 4140), ABS, Nylon | Same as 3-axis | Same as 3-axis | Same as 3-axis | Material selection affects tool wear and tolerance stability |
| Aluminum Machinability | Excellent | Excellent | Excellent | Excellent | High MRR; requires chip evacuation and cooling |
| Steel Machinability | Good (depends on grade) | Good | Good (high-end machines preferred) | Good | Hardened steels require slower speeds and rigid setups |
| ABS Machinability | Good (low heat) | Good | Good | Limited (rarely turned) | Low melting point; sharp tools and low feed rates required |
| Nylon Machinability | Good (with fixturing) | Good | Fair (flexibility issues) | Good (for cylindrical parts) | Hygroscopic; may require pre-drying and stable clamping |
| Fixturing Method | Vise, clamps, custom fixtures | Rotary table + vise/clamps | Multi-sided fixturing, tombstones | Collet or chuck | 5-axis reduces need for multiple setups |
| Applications | Flat, prismatic parts | Indexing features, angled holes | Complex contours, aerospace components | Shafts, bushings, fasteners | Tight tolerance parts used in medical, aerospace, automation |
Notes on Tight Tolerances:
Achieving tolerances below ±0.005 mm requires environmental controls (stable temperature), precision CMM validation, and often post-process inspection. Materials like aluminum and steel are more dimensionally stable for such requirements compared to plastics like ABS and nylon, which are prone to thermal expansion and moisture absorption.
Material-Specific Considerations:
Aluminum (6061-T6, 7075-T6): Preferred for lightweight, high-strength precision parts. Excellent thermal conductivity aids in heat dissipation during machining.
Steel (4140, 1018): Used for high-wear or structural components. Tight tolerances often require stress-relieved stock to prevent warping.
ABS: Suitable for prototypes and non-structural parts. Dimensional stability is lower; best for ±0.05 mm or looser.
Nylon (6, 6/6): Good wear and chemical resistance. Machining requires sharp tools and secure fixturing due to material creep.
For full conformance, CNC drawings should include GD&T (Geometric Dimensioning and Tolerancing), surface finish callouts, datum references, and notes on inspection requirements—especially for mission-critical components in regulated industries.
From CAD to Part: The Process

Honyo Prototype executes CNC machining projects through a rigorously defined workflow designed to maximize accuracy, efficiency, and client transparency. The term “CNC drawing” refers to the technical documentation package guiding the machining process, but our core service is precision CNC machining driven by this structured sequence.
Clients initiate the process by uploading native CAD files (STEP, IGES, Parasolid) or industry-standard 2D drawings (PDF, DWG) to our secure customer portal. Our system automatically extracts critical geometry, material specifications, and initial tolerance requirements. This digital handshake ensures unambiguous interpretation of the part design from the outset, eliminating manual data entry errors.
The uploaded data feeds directly into our proprietary AI-powered quoting engine. This system cross-references the geometry against Honyo’s extensive historical production database, real-time machine availability, material market pricing, and shop floor efficiency metrics. The AI generates a preliminary cost and lead time estimate within minutes, factoring in material waste factors, fixture complexity, and secondary operation needs. Crucially, this is not a blind algorithm; the output undergoes immediate validation by our engineering team to address nuances AI may miss, such as unique surface finish requirements or non-standard material certifications.
Following quote acceptance, the project enters our mandatory Design for Manufacturability (DFM) review stage. This is where Honyo’s engineering expertise delivers significant value beyond automated systems. Our senior manufacturing engineers perform a detailed technical assessment, focusing on:
| DFM Parameter | Key Checks Performed | Outcome for Client |
|---|---|---|
| Geometric Feasibility | Internal corner radii, thin wall stability, deep cavity aspect ratios, undercuts | Prevents tool breakage, ensures dimensional accuracy |
| Tolerance Analysis | GD&T stack-up validation, feasibility of specified tolerances vs. process capability | Eliminates over-engineering, reduces cost |
| Material Optimization | Alloy suitability for machining, stock size availability, thermal stress risks | Improves yield, avoids material waste |
| Process Planning | Optimal setup sequencing, toolpath strategy validation, fixture requirement review | Minimizes machine time, ensures repeatability |
The DFM report provides actionable recommendations, often suggesting minor design adjustments that maintain functional intent while significantly improving machinability and reducing lead time. Client approval of the DFM findings is required before proceeding, ensuring alignment on any proposed modifications.
Approved projects move to production on our certified CNC equipment network (mills up to 5-axis, lathes with live tooling). Each job receives a unique digital work order triggering: material kitting from our climate-controlled stock, CAM programming verification via Mastercam/Siemens NX, and setup validation using Renishaw probes. Real-time machine monitoring tracks spindle load, cycle time adherence, and tool wear, with automated alerts for any deviations from the approved process plan. All critical dimensions undergo in-process CMM verification against the original drawing specifications.
Final delivery includes the machined components with full material certification (Mill Test Reports), first-article inspection reports (FAIR) detailing actual vs. nominal dimensions, and a comprehensive digital documentation package accessible via our client portal. Parts are packaged to ANSI/ESD S20.20 standards for sensitive components, with global shipping options managed through our logistics partners. Throughout this workflow, clients receive automated status updates at each phase transition, providing complete visibility from CAD upload to doorstep delivery. This integrated approach ensures technical rigor while maintaining the agility expected in rapid prototyping and low-volume production environments.
Start Your Project

Need precision CNC machining based on your technical drawings? Contact Susan Leo at [email protected] to discuss your project.
Honyo Prototype operates a dedicated manufacturing facility in Shenzhen, ensuring fast turnaround and strict quality control for all CNC machining services.
Submit your CNC drawing today and receive a competitive quote from our engineering team.
🚀 Rapid Prototyping Estimator
Estimate rough cost index based on volume.